
Saab V4 door locks
This document describes the dismantling and servicing of the Saab door locks, which can become unreliable after some years.

This document describes the dismantling and servicing of the Saab door locks, which can become unreliable after some years.

The door handle needs to be removed first, by undoing the screw circled......
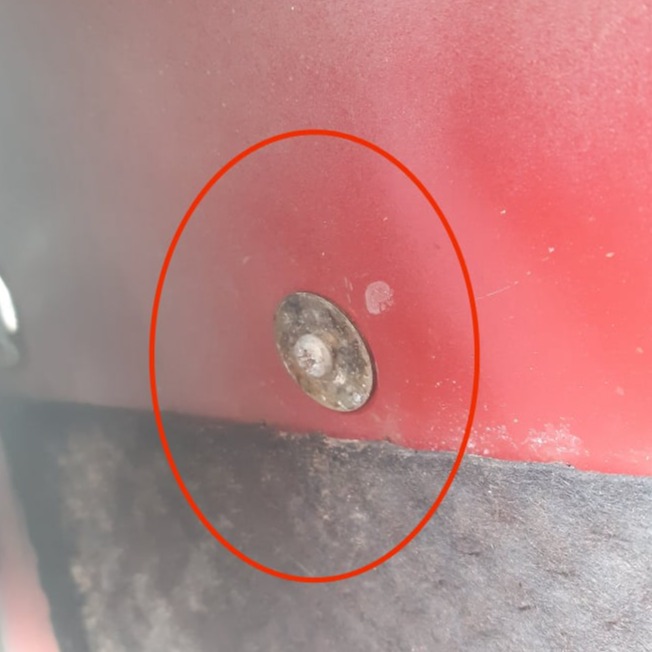
.....followed by the screw on the inside of the door, which will require the door card to be removed.

This screw is best accessed by removing the bung shown............

.....and using a long screwdriver.
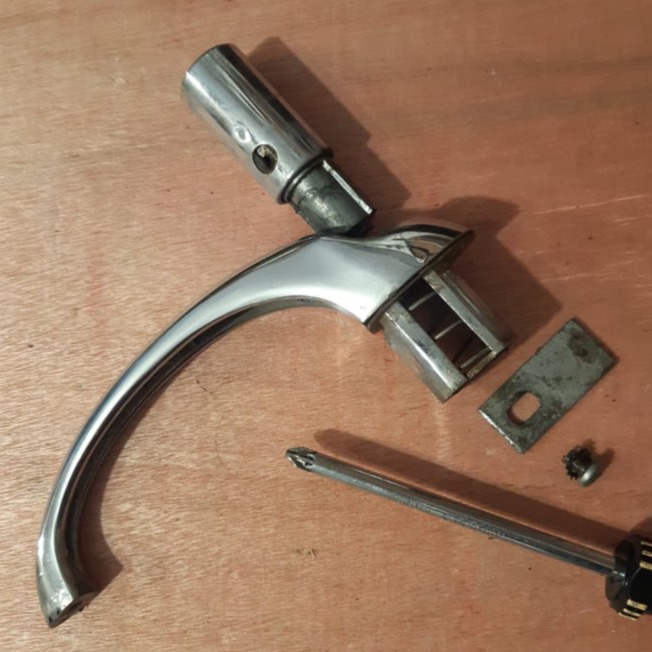
With the handle on the bench, the barrel can be separated from the handle, by removing the small screw holding the lock plate to the barrel.
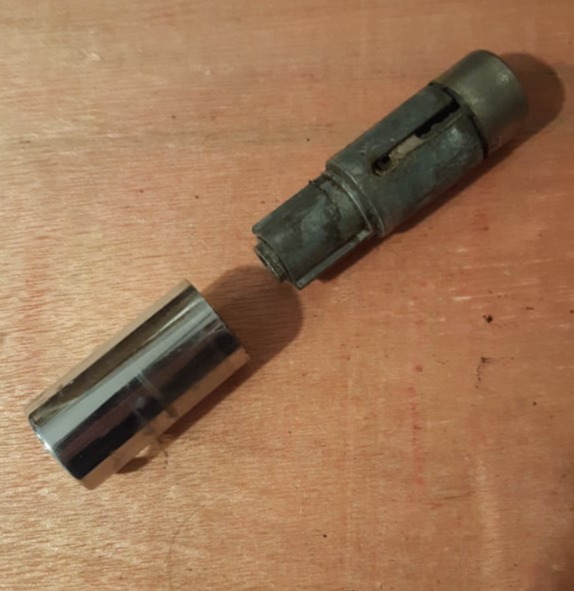
The chrome shroud will need to be removed by hand, to expose the inner barrel.
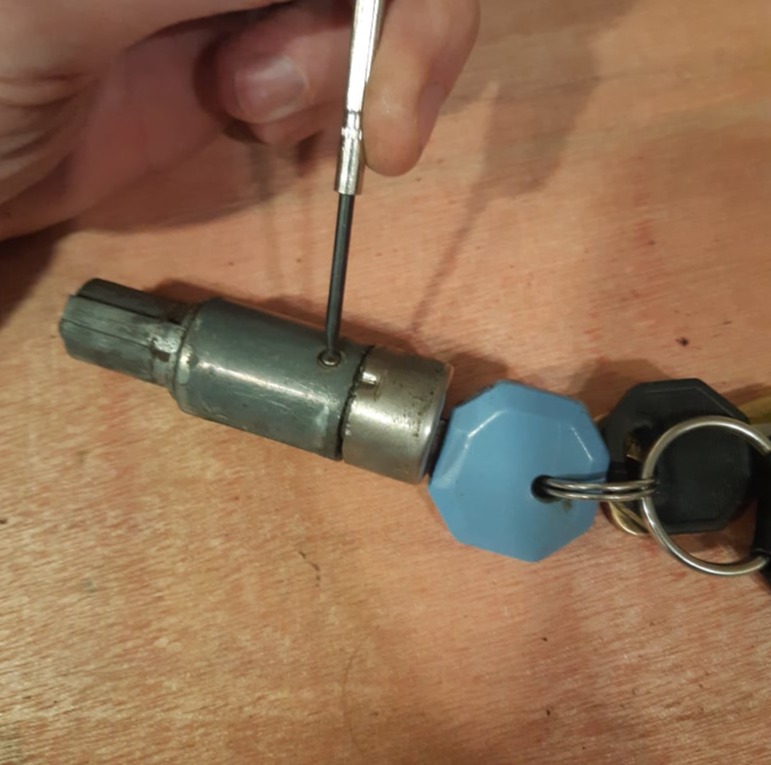
To strip the lock down further, the key must be inserted and turned "part-way" whilst the holding pin is depressed. The key will often need wiggling to find the release position.
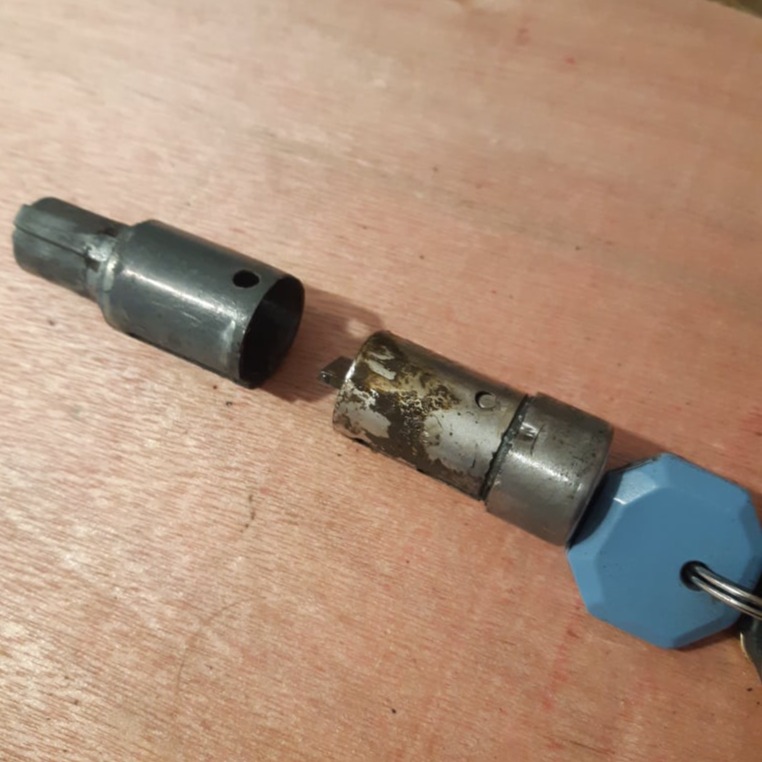
Once the holding pin is fully depressed the key barrel can be pulled clear from the housing.

The same process is needed to remove the lock sheath, but be aware that as the sheath is pulled off, the pin springs will try to jump out.
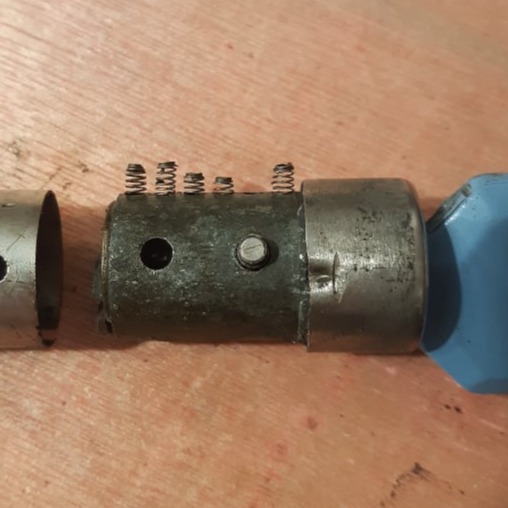
The sheath will need to be withdrawn progressively exposing each spring in turn. All the springs are the same. On this lock there was one spring position not used.
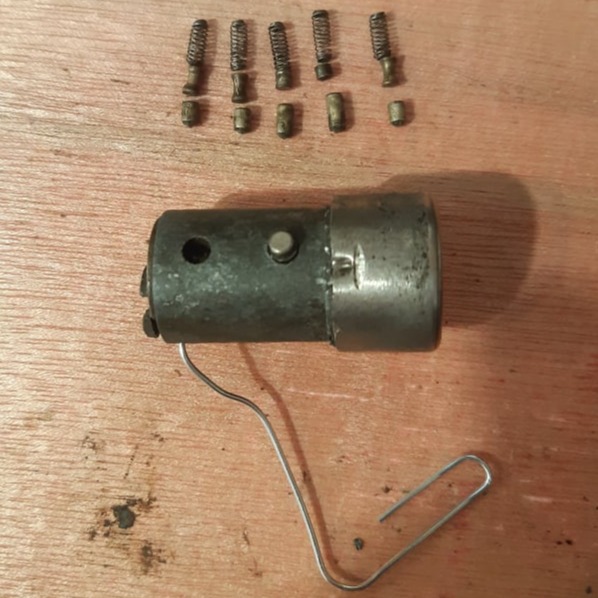
The lock pins sit under the springs and these are ordered to match the key, so their position should be maintained. They can be removed by pushing from below with a paperclip.
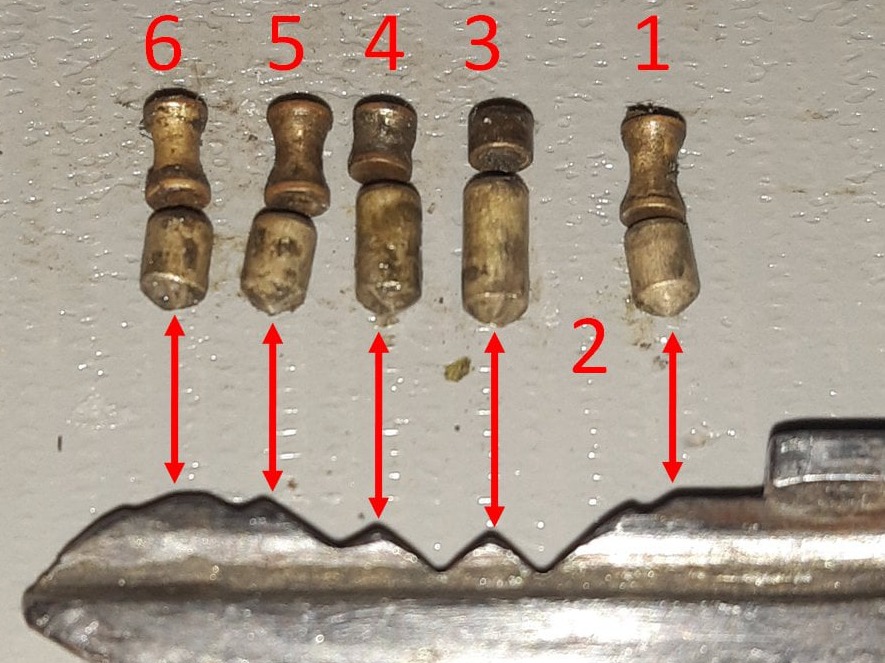
If the pins and springs get mixed up it is possible to work out their position against the key profile. This process can also be used to rebuild a lock to match a key.
The lock works by creating a level split line across all the pins when the key is fully inserted. Each pin has a spring, an upper pin and a lower pin. The lower pin is orientated so that the rounded end points down to assist the key sliding past.
All the springs are the same, but each pair of pins must equal the same height, so the shortest upper pin must be paired with longest lower pin.
If any pins are missing or broken they can be omitted and the lock will still work, albeit slightly less secure that a fully populated build.
The image shows how the different length pins match up with the different height peaks on the key. On this car, both door locks didn't use pin 2.
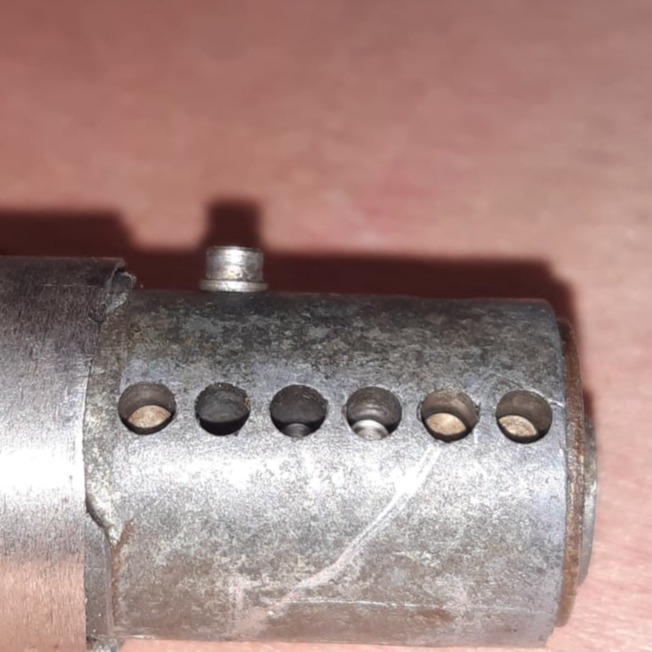
To reassemble the lock, the lower, then upper pins should be put back in their holes. With the pins pushed down the key should turn. If it doesn't, then the pin pattern doesn't match the key.

As the sheath is slid on the barrel, each spring will need tucking in. If any lubrication is considered, graphite powder is best for locks.
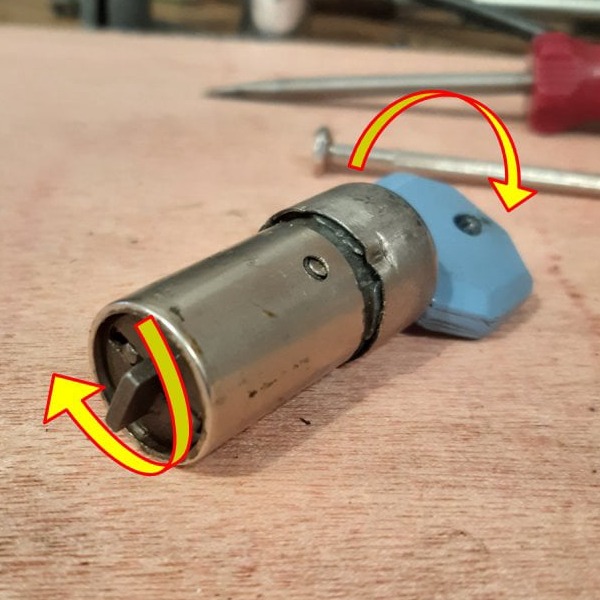
As the last spring is assembled, ensure the twist plate is engaged with the key barrel by turning them both and finding the position where they engage and turn together.

The housing should be pushed on next, ensuring that the twist plate engages correctly.......

....then the chrome shroud, which should be orientated with the dimple "in-line" with the slot shown.
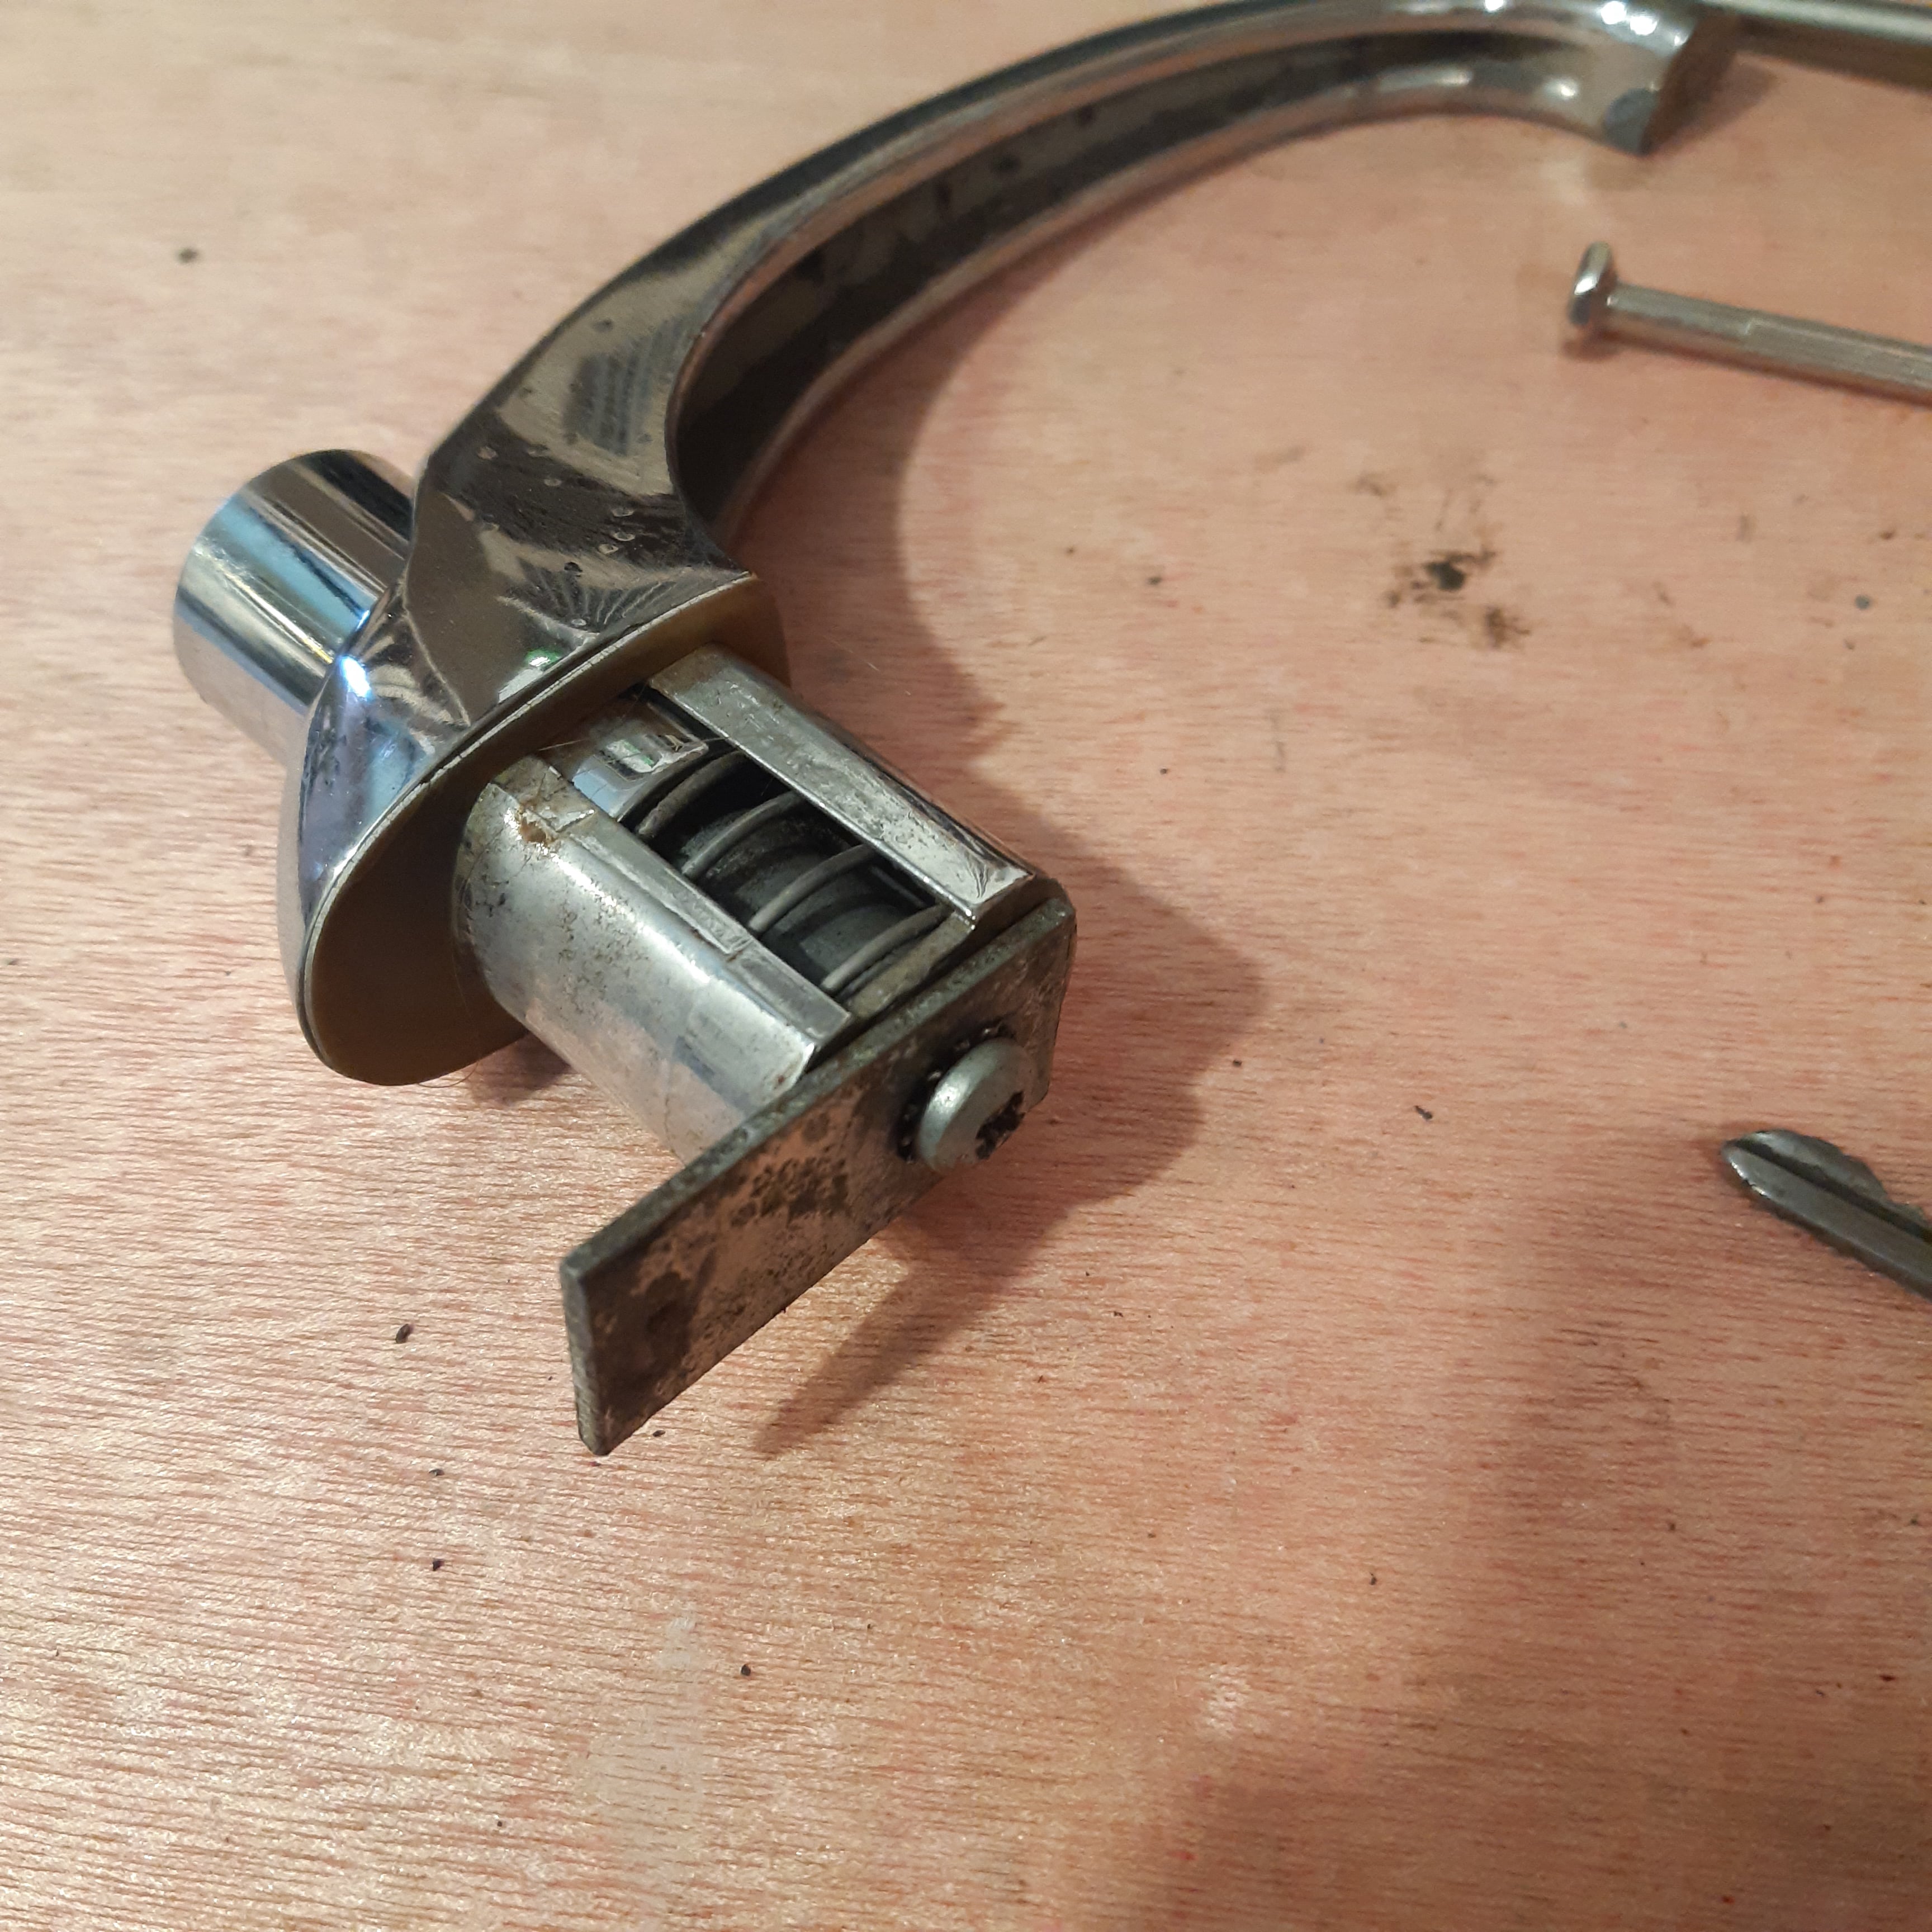
When attaching the lock plate, ensure that it can be turned by the key to point outwards (as shown) so that it can engage with the latch mechanism in the car door.
Offline Website Software